
STEP BY STEP
Make a photo sticker book, add writing, and save or share it
Pick photos first and find a layout that fits, or start with a layout and paper. Writing layouts give your memories room for words. Check what your saved images and public web copy will include before sharing.
Before you start
- 01If a feature is not in your bottom tabs, open it from “Apps”.
- 02Photos chosen from your phone also go into the family album. Start with photos you are happy to share at home. Check paper availability; you can begin with a free paper.
- 03To start with photos, follow steps 3–5. To choose a layout before adding photos, follow steps 6–10. Once your photos are in place, go to step 11. To start with writing, follow steps 12–16. Saving and web sharing start at step 17. If a page already has a text box, start writing at step 14.
Steps
- 1
Step 1
Add a page in Sticker book
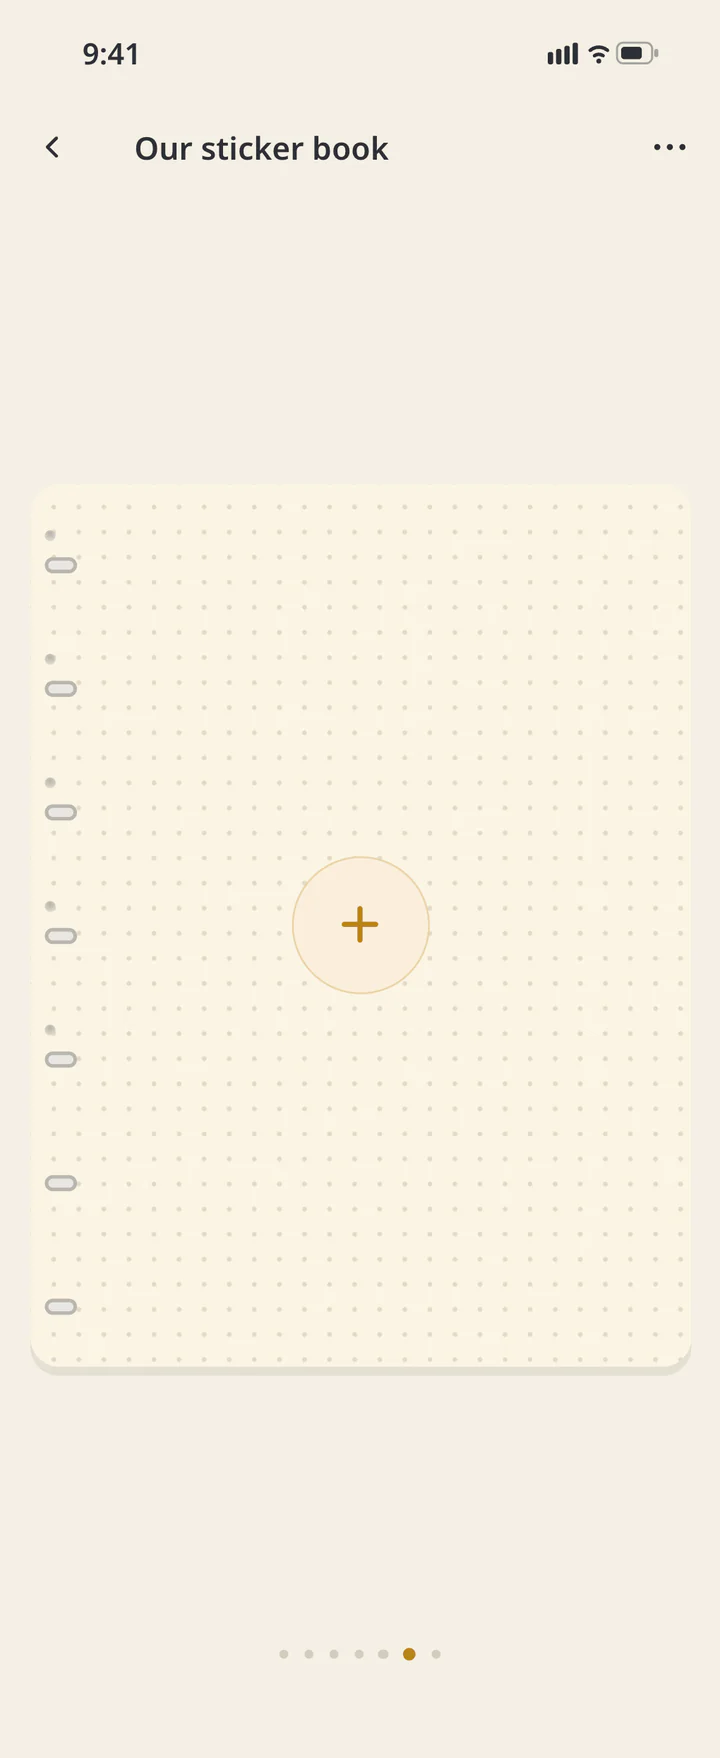
Open “Sticker book” and choose “+ Add a page” from the book’s menu.
Add a page in Sticker book - 2
Step 2If needed
Browse the sample books for ideas
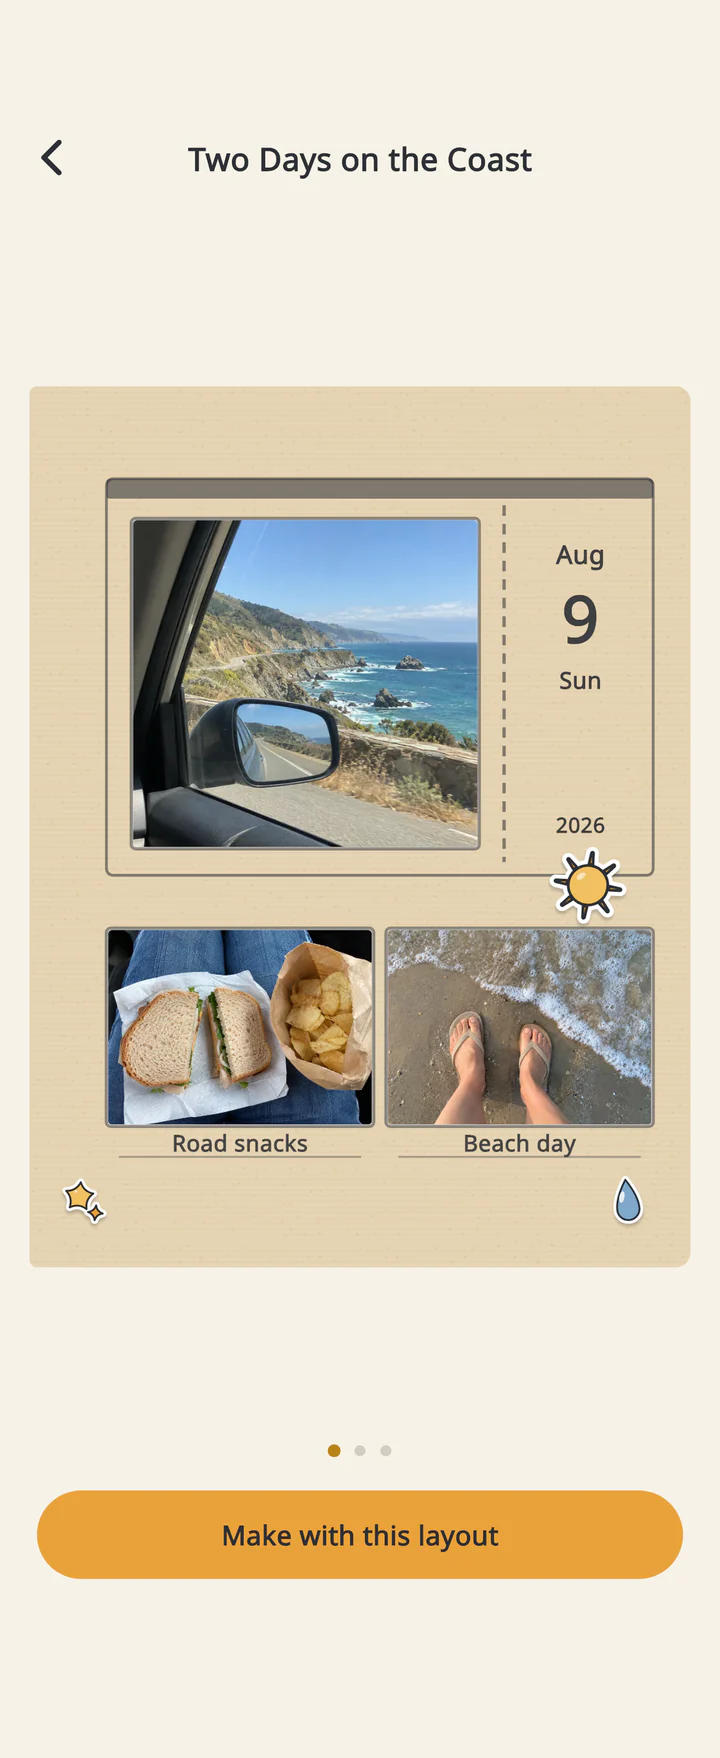
In the layout picker, open “See sample books”, choose one of the five books and turn its pages. Tap “Make with this layout” on a page you like to enter that layout’s setup and paper selection. To choose your photos first, browse without creating a page, return to the layout picker and go to step 3. If you create a page from a sample, go to step 8 for a page with photo frames, or step 14 for one with text boxes.
Browse the sample books for ideas - 3
Step 3If needed
Open Make from photos
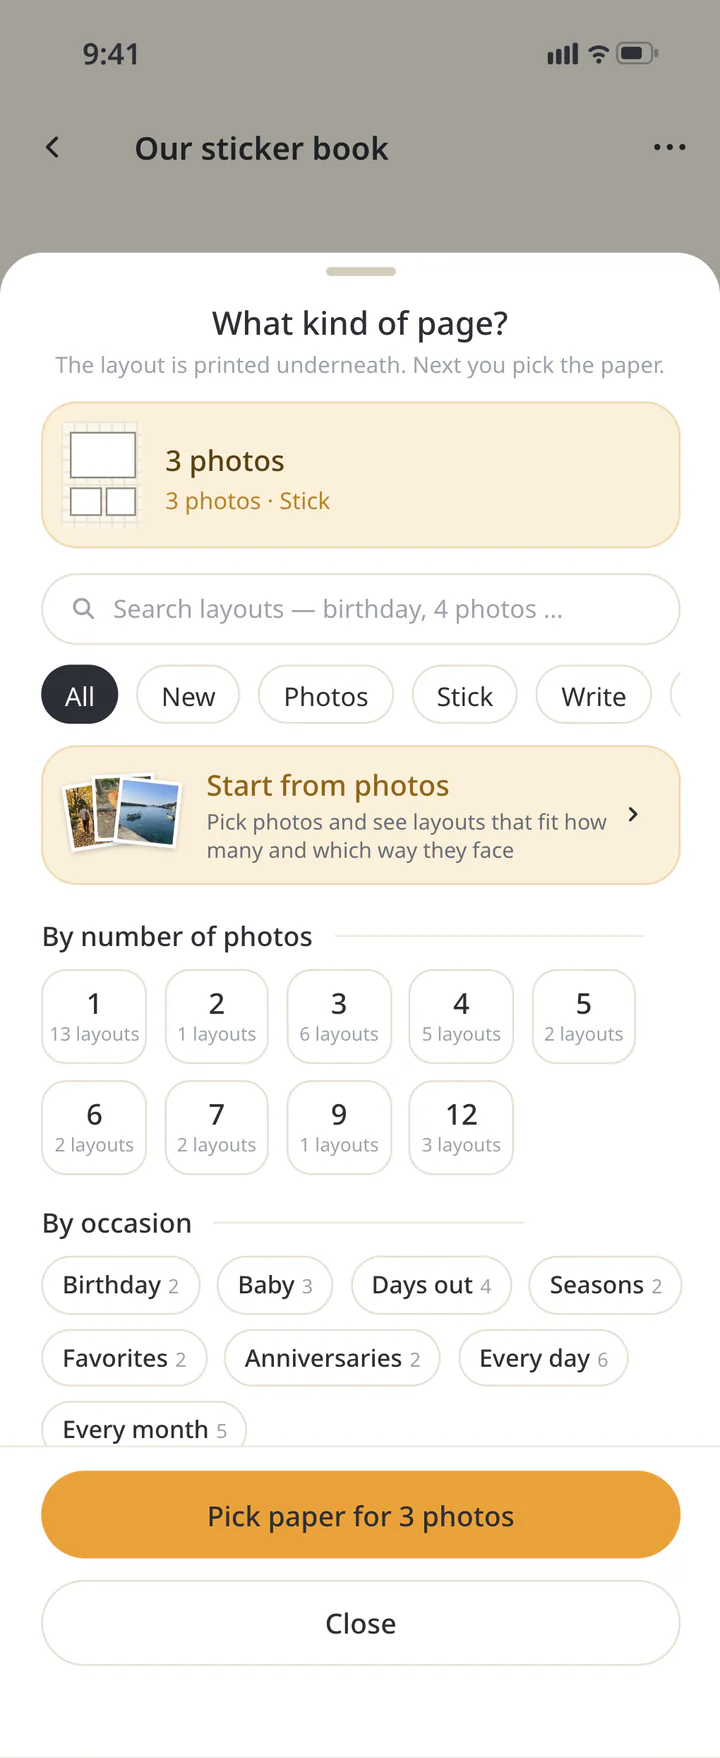
To start with your photos, tap “Start from photos” in the layout picker. This opens a flow that finds layouts to suit the number and orientation of your photos.
Open Make from photos - 4
Step 4If needed
Pick several photos from the album or your phone
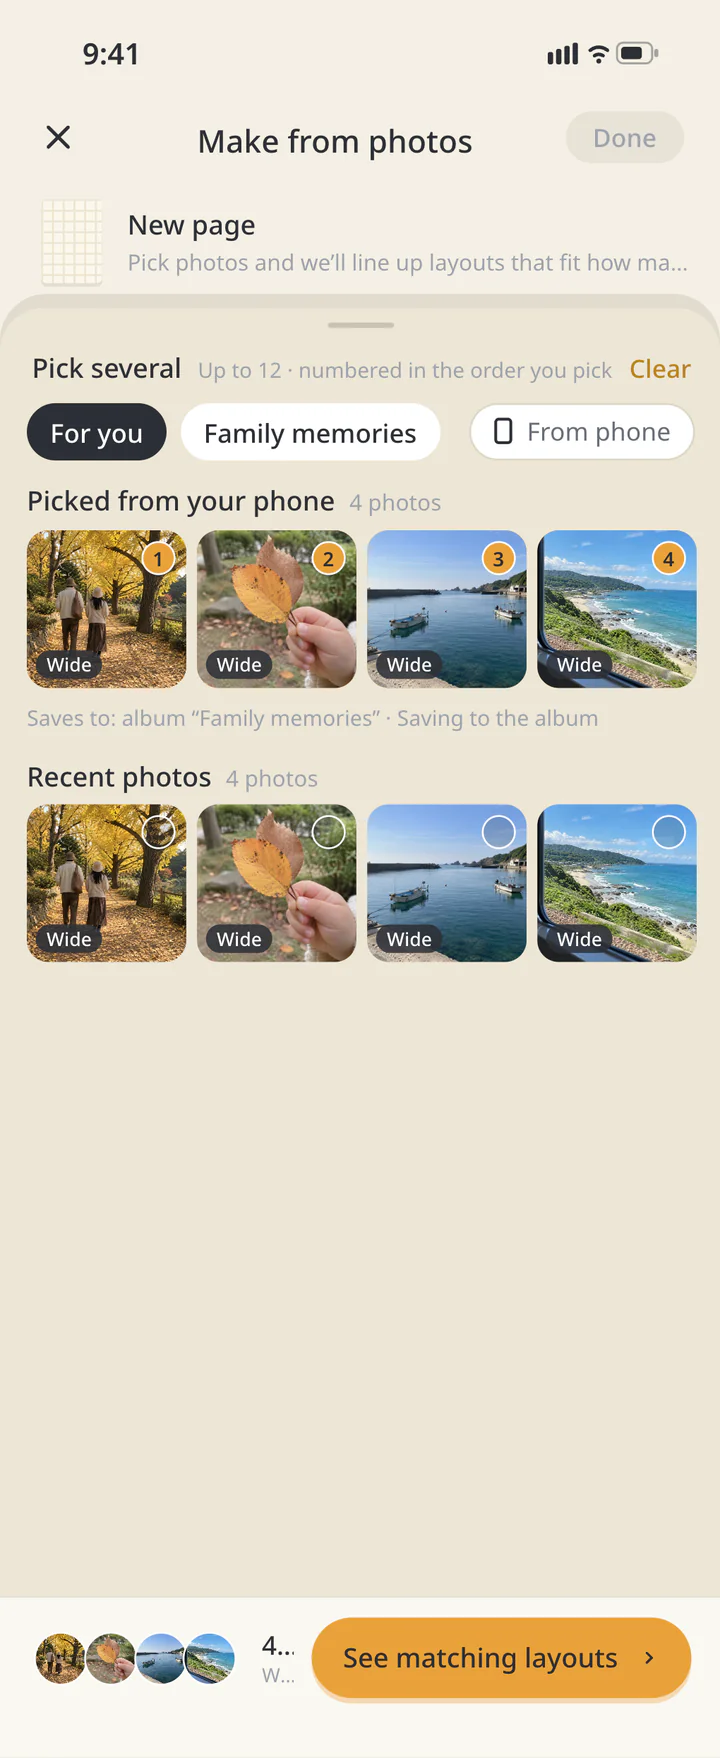
Tap photos in the family album to select them, or tap “From phone” to choose phone photos. You can select up to 12 in total; selected photos are numbered. Phone photos also go into the family album. You can tap “See matching layouts” while they are still saving.
Pick several photos from the album or your phone - 5
Step 5If needed
Choose a matching layout and create the page
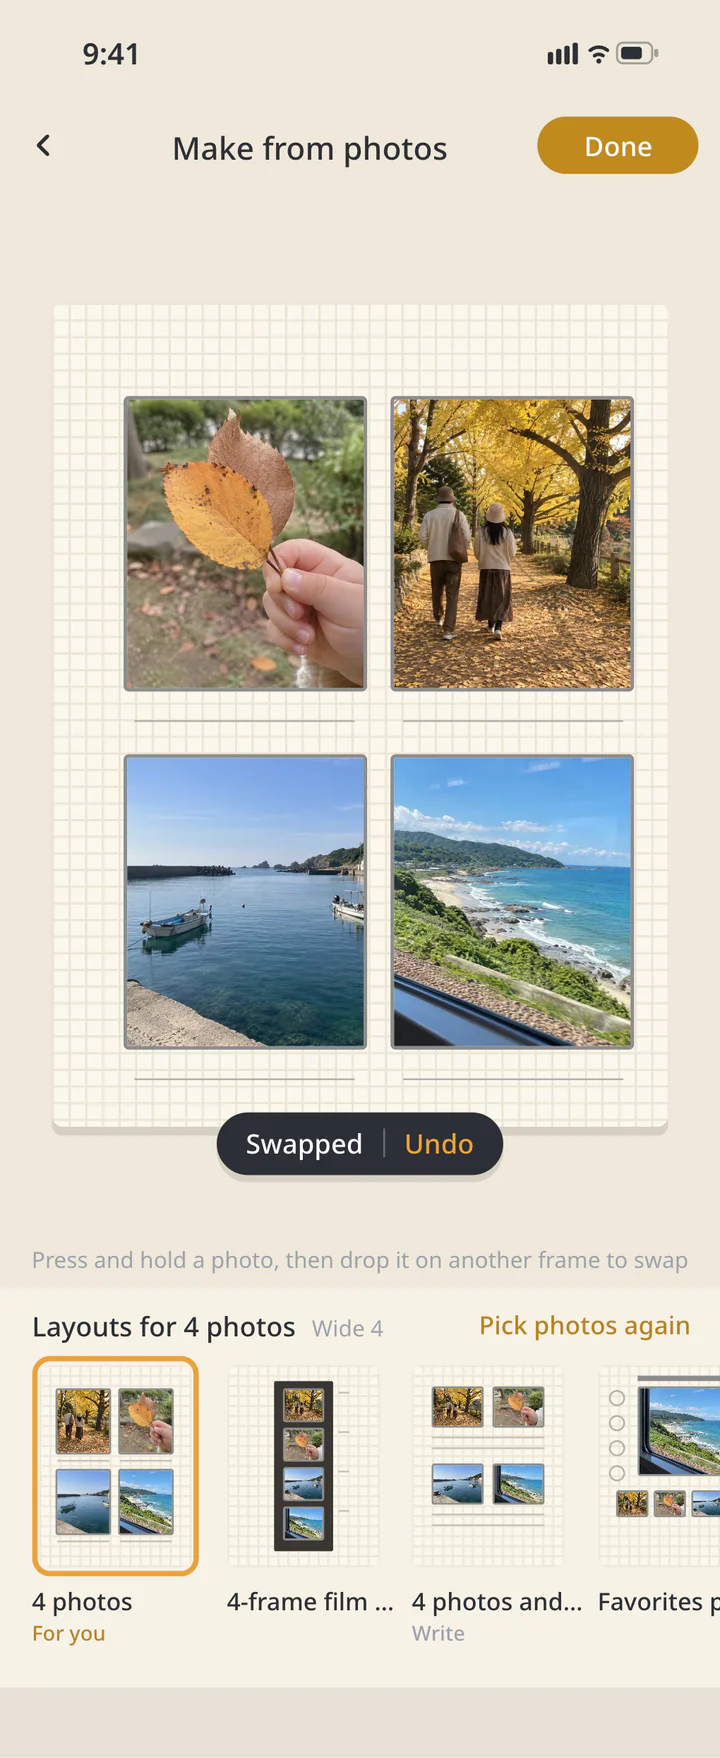
Tap a layout to check how your photos fit. To swap positions, press and hold a photo, then drop it onto another frame. Tap “Done”. If the layout asks for a date or other details, fill them in and continue. The page is created with its available default paper. Choose another available paper only if the paper picker appears. To add photos, continue with steps 8–10; to finish the page, go to step 11.
Choose a matching layout and create the page - 6
Step 6If needed
Choose a layout with photo frames
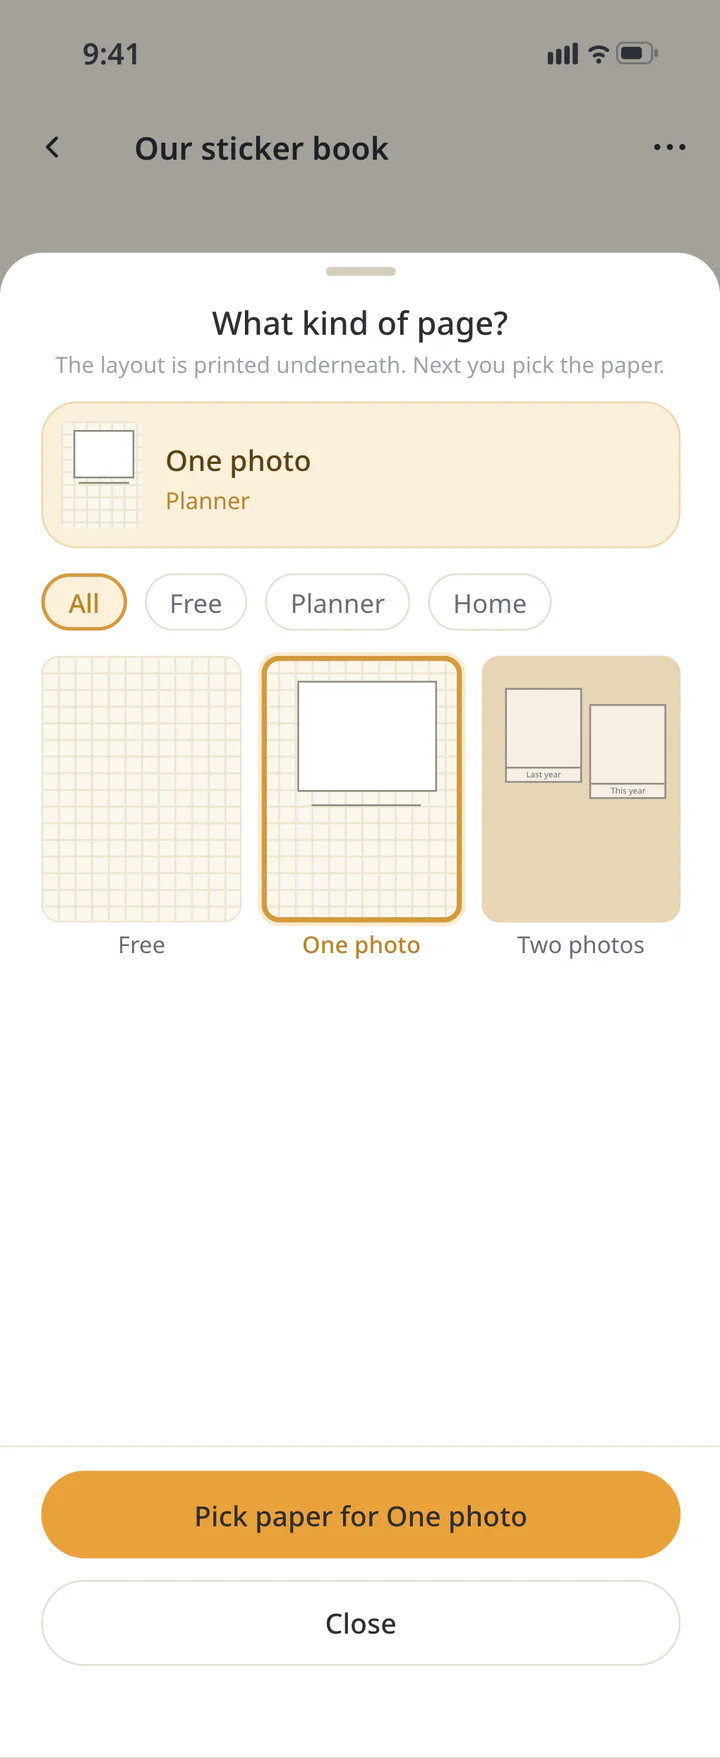
Choose a layout with photo frames. If it asks for a date or other details, fill those in on the next screen. Use the layouts and names shown in the picker.
Choose a layout with photo frames - 7
Step 7If needed
Choose paper and create the page
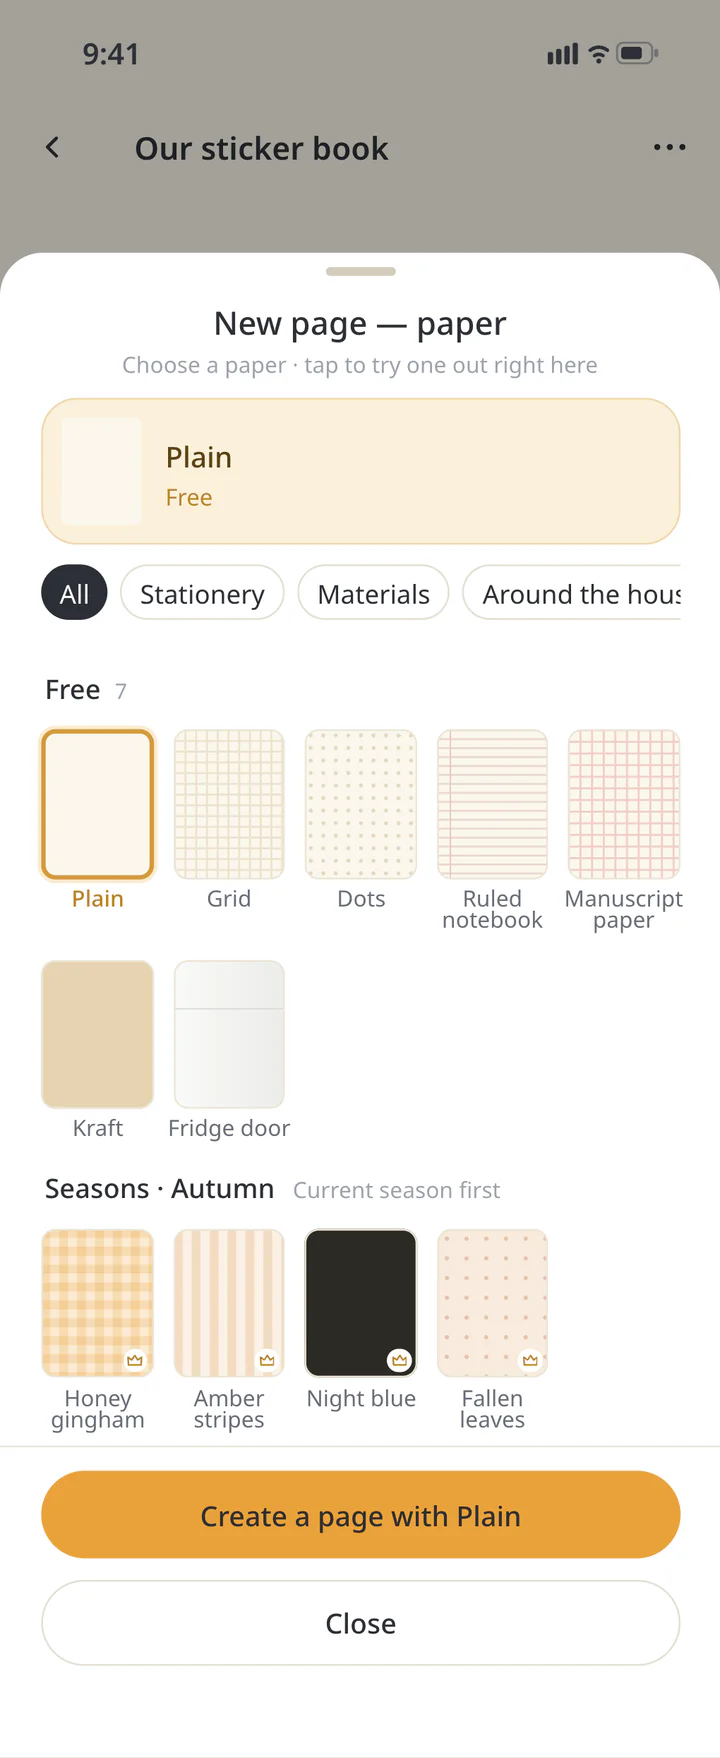
Choose an available paper, then press the creation button that includes its name. The new page opens in “Place stickers”.
Choose paper and create the page - 8
Step 8If needed
Tap a frame and choose a photo
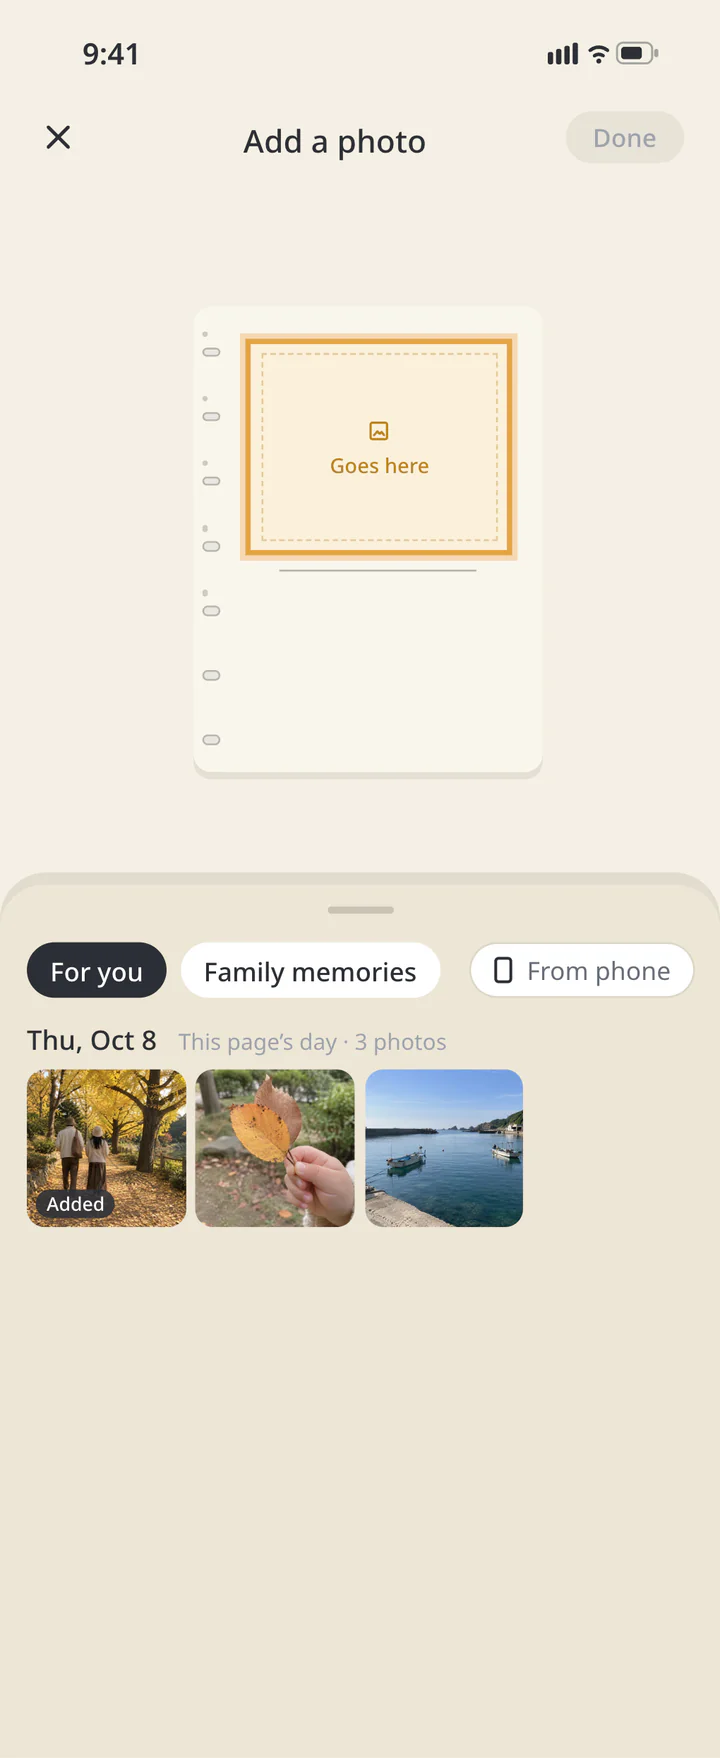
Tap a photo frame in “Place stickers”. Choose a family album photo or use “From phone”. A phone photo is also saved to the destination family album shown on screen.
Tap a frame and choose a photo - 9
Step 9If needed
Fill several empty frames at once
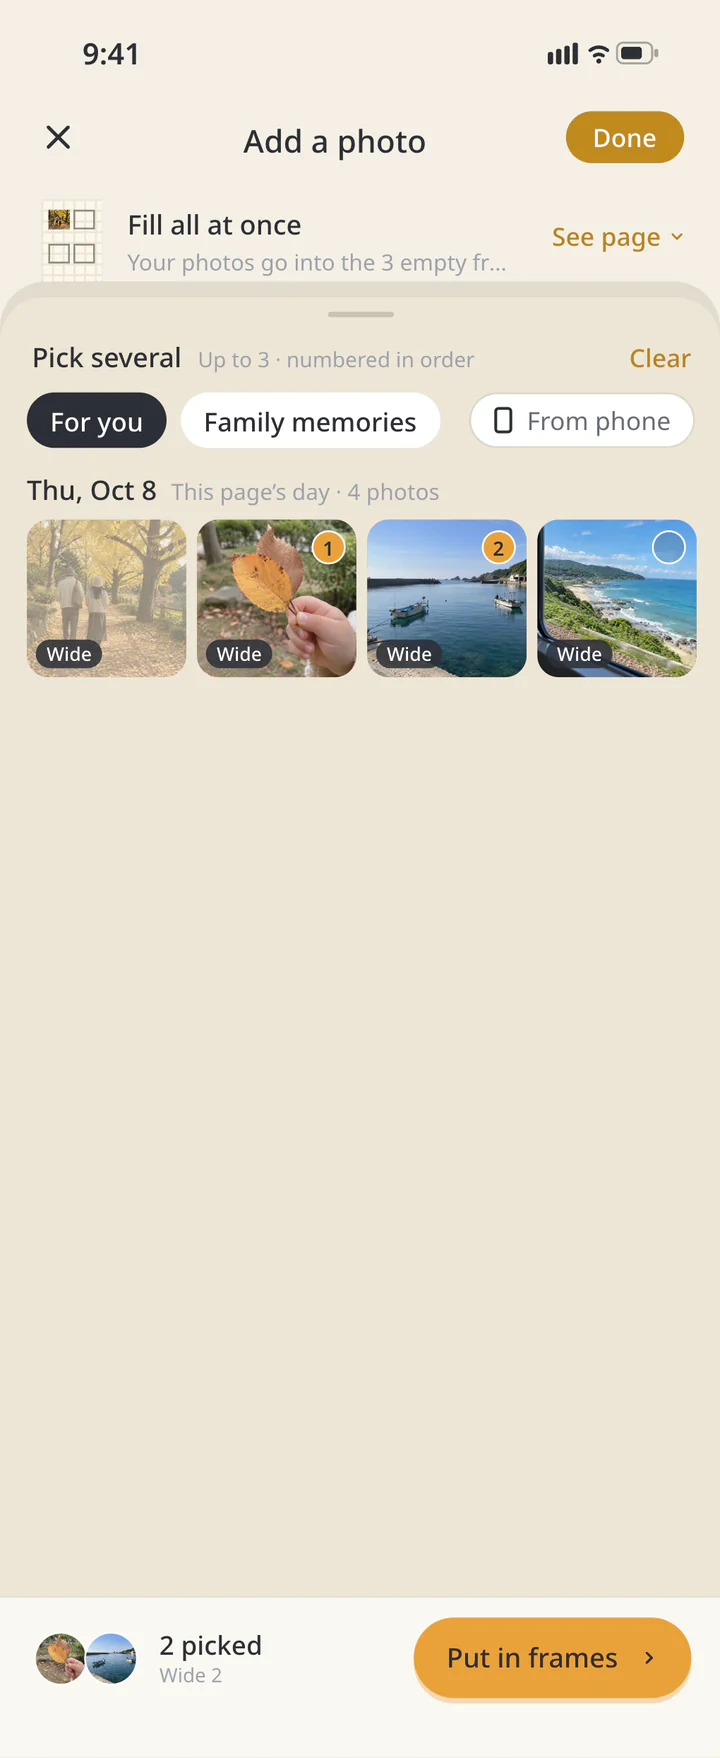
In the page editor, tap a photo frame. If the family album has photos and at least two frames are empty, the photo drawer offers “Fill all at once”. Tap it, choose no more photos than there are empty frames, then tap “Put in frames”. You can also choose photos using “From phone”. Existing photos stay in place; your selection fills only the empty frames.
Fill several empty frames at once - 10
Step 10If needed
Adjust the photo and place it
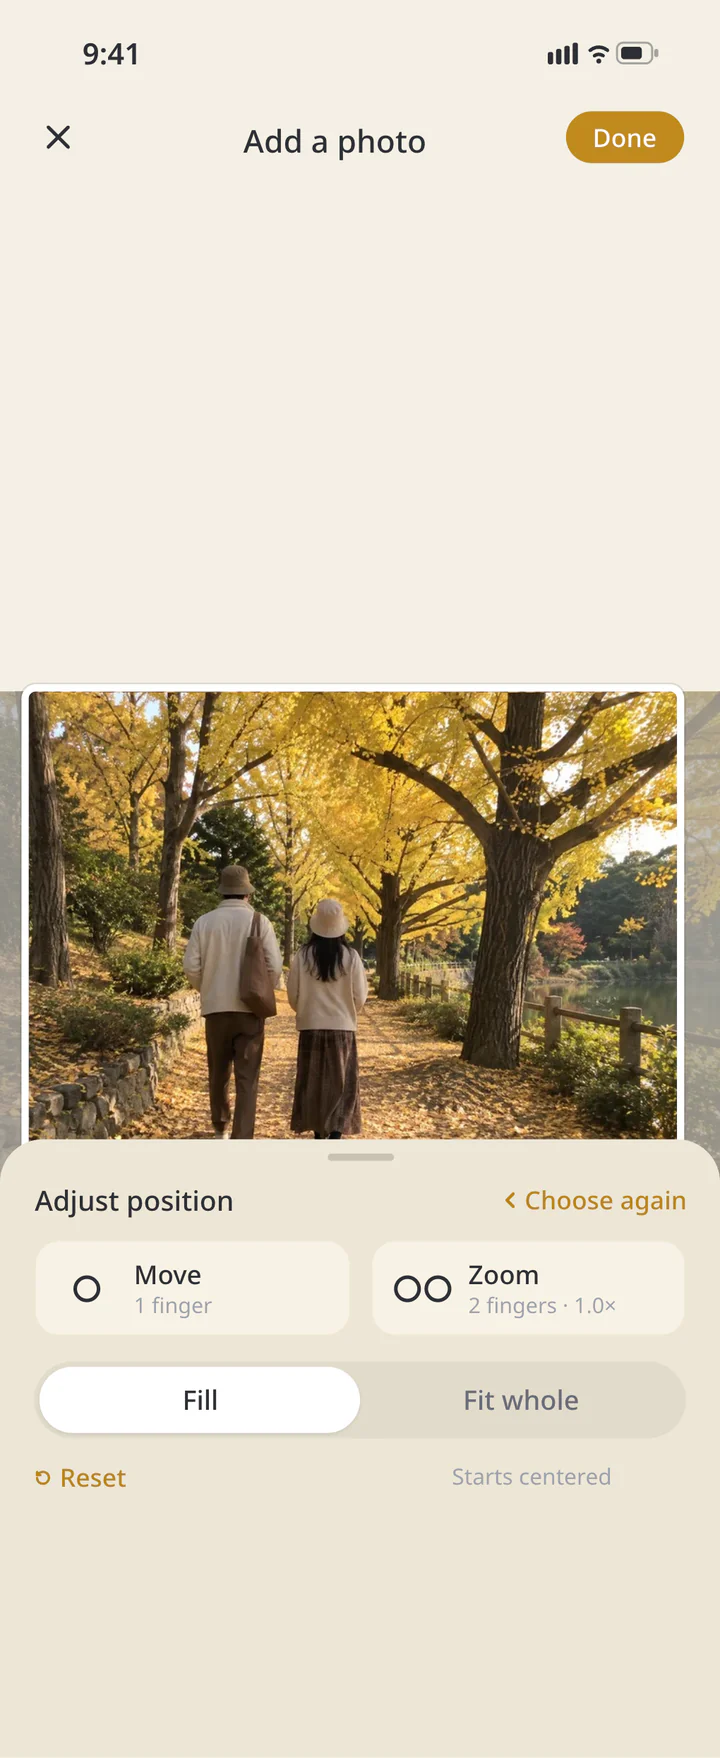
Use “Adjust” if the framing needs adjustment. Move with one finger and zoom with two, then tap “Done” to place the photo.
Adjust the photo and place it - 11
Step 11
Finish the page
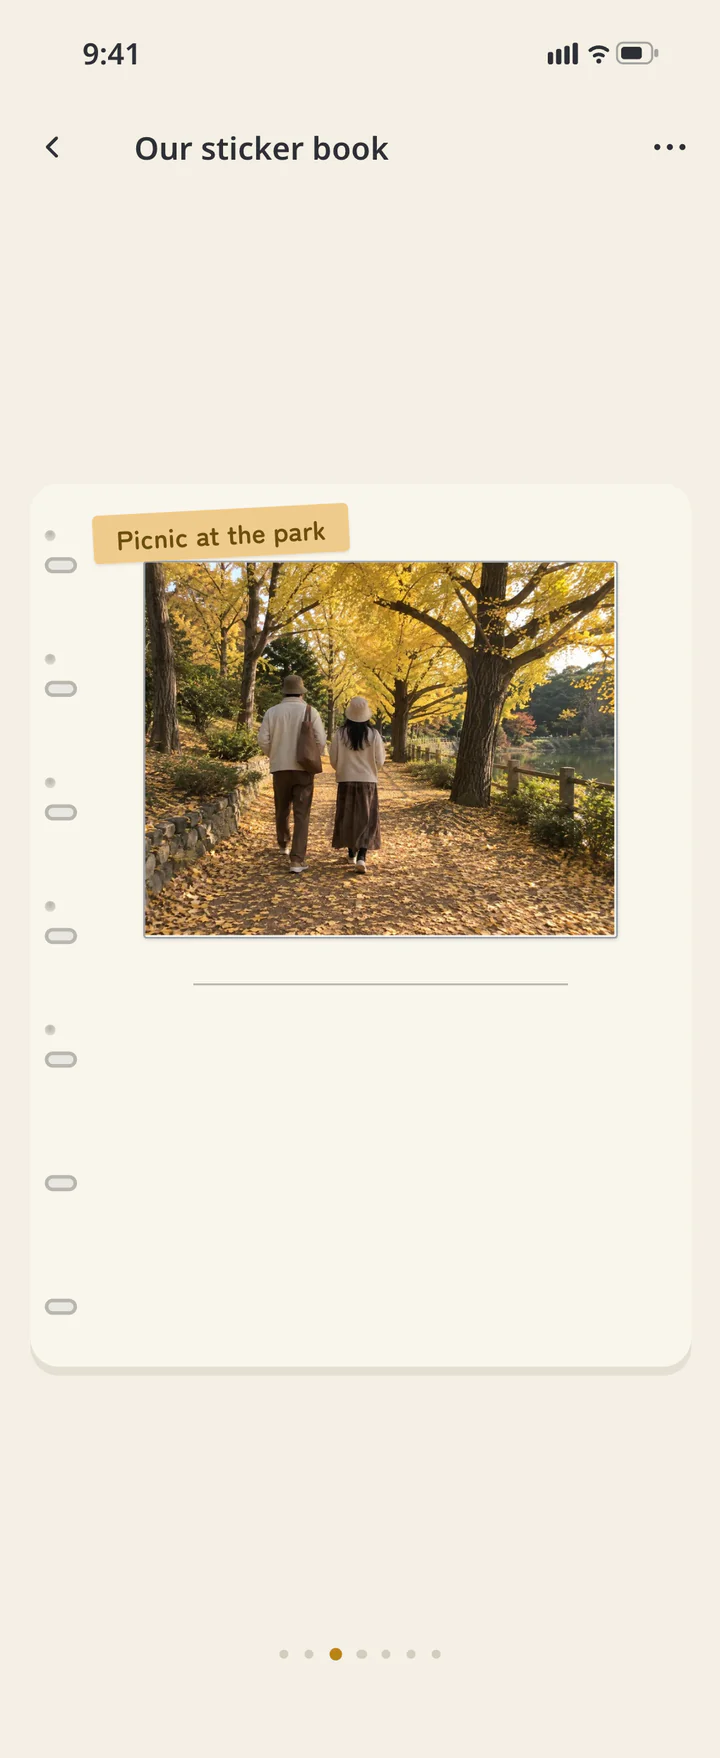
Check the photos and tap “Done” at the top. To change a photo later, tap the page’s paper to enter editing, then tap its frame.
Finish the page - 12
Step 12If needed
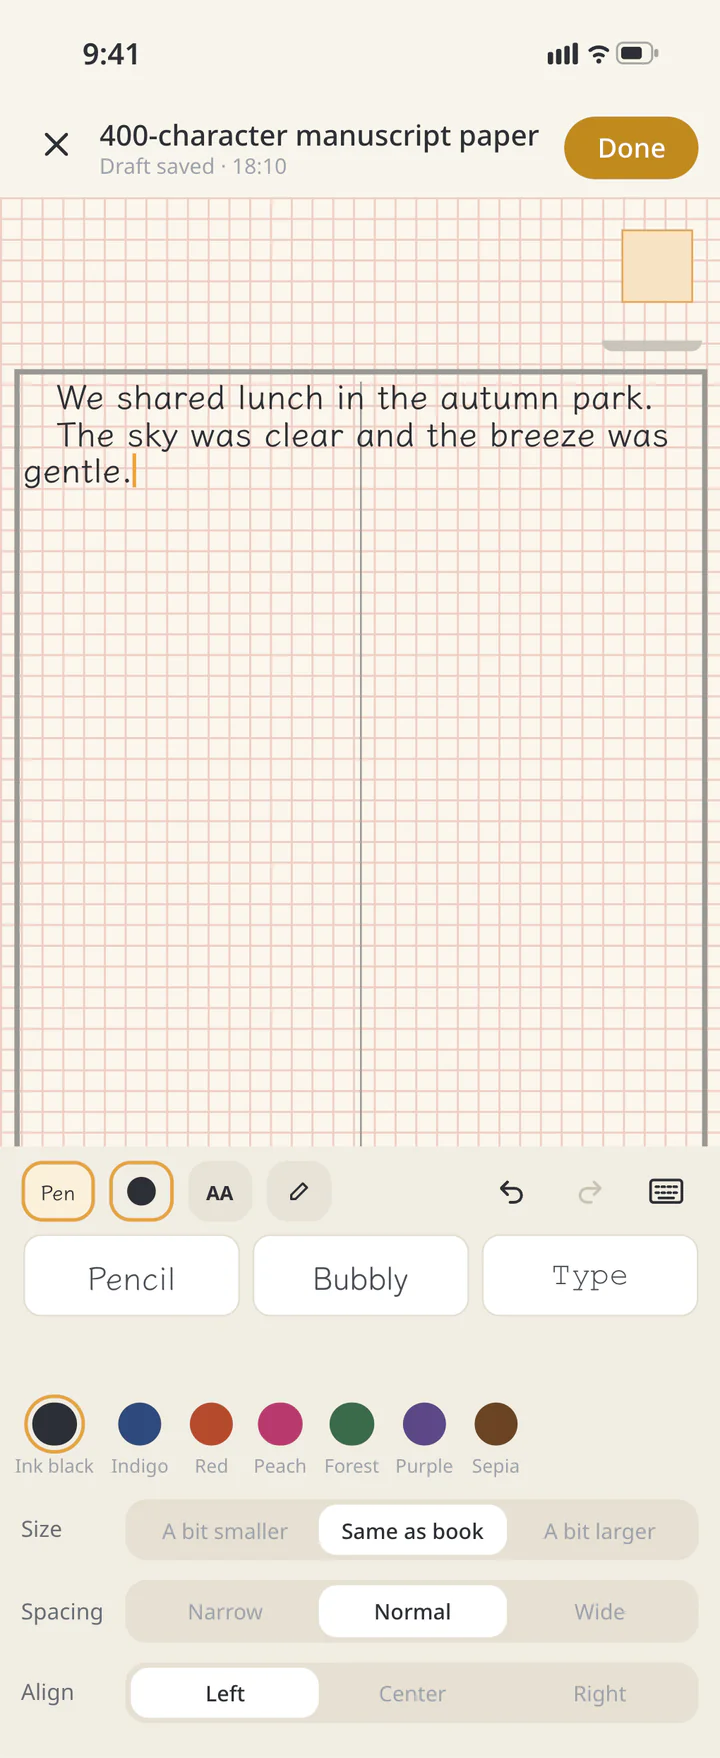
Choose “One-day diary”, “Family timeline”, “Letter paper”, “Messages from the family” or “400-character manuscript paper”
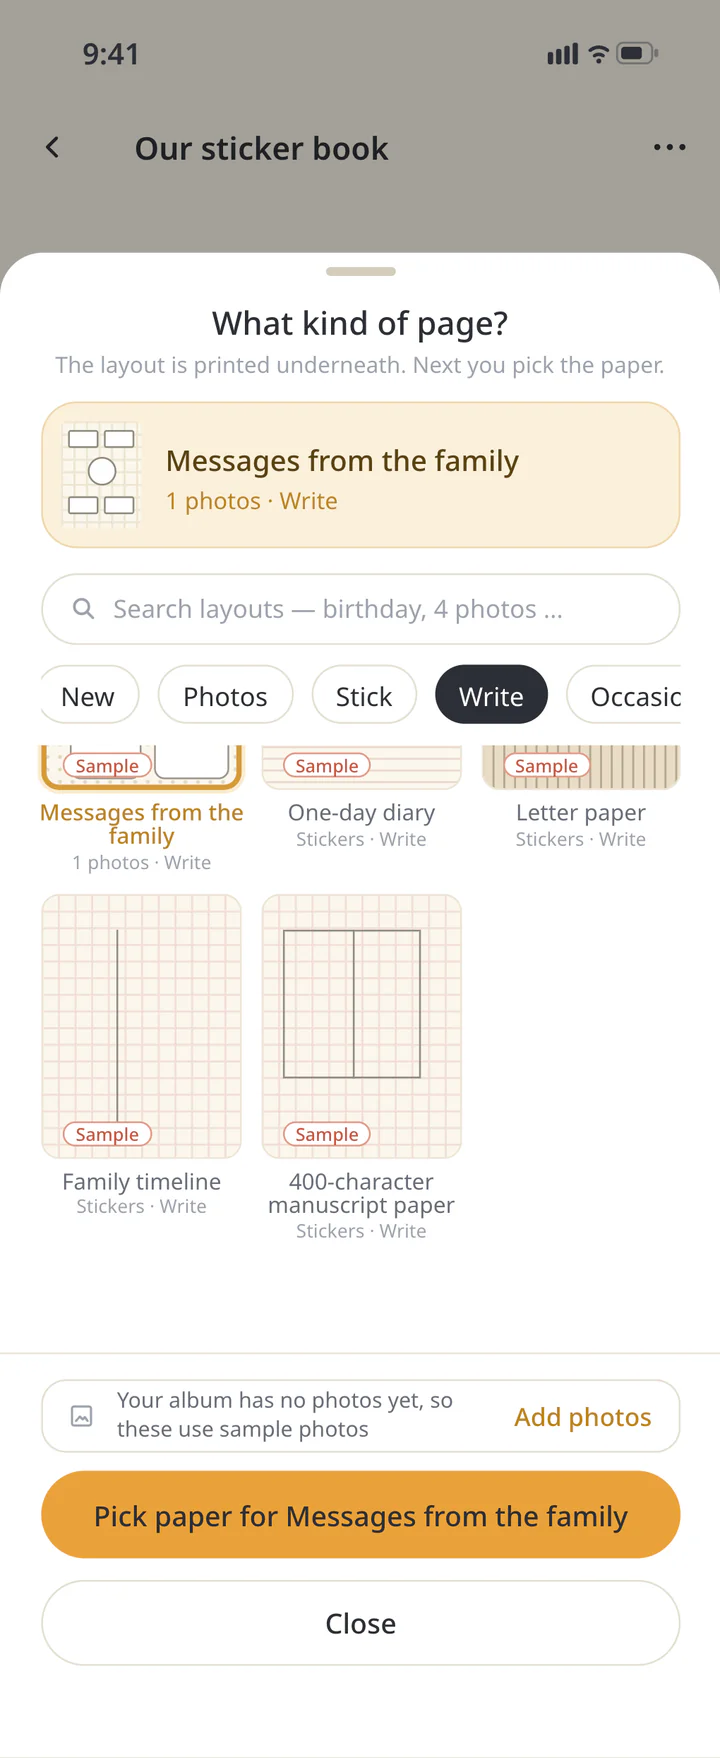
In the layout picker, filter with “Write”. If you are reading the book, first open the picker through “+ Add a page” in the book menu. Choose “One-day diary”, “Family timeline”, “Letter paper”, “Messages from the family” or “400-character manuscript paper” to suit what you want to write. Some layouts combine photos and text. Use the names displayed in the picker, then press the paper-selection button containing your chosen layout’s name.
Choose “One-day diary”, “Family timeline”, “Letter paper”, “Messages from the family” or “400-character manuscript paper” - 13
Step 13If needed
Set the date, writers or recipient, then choose paper
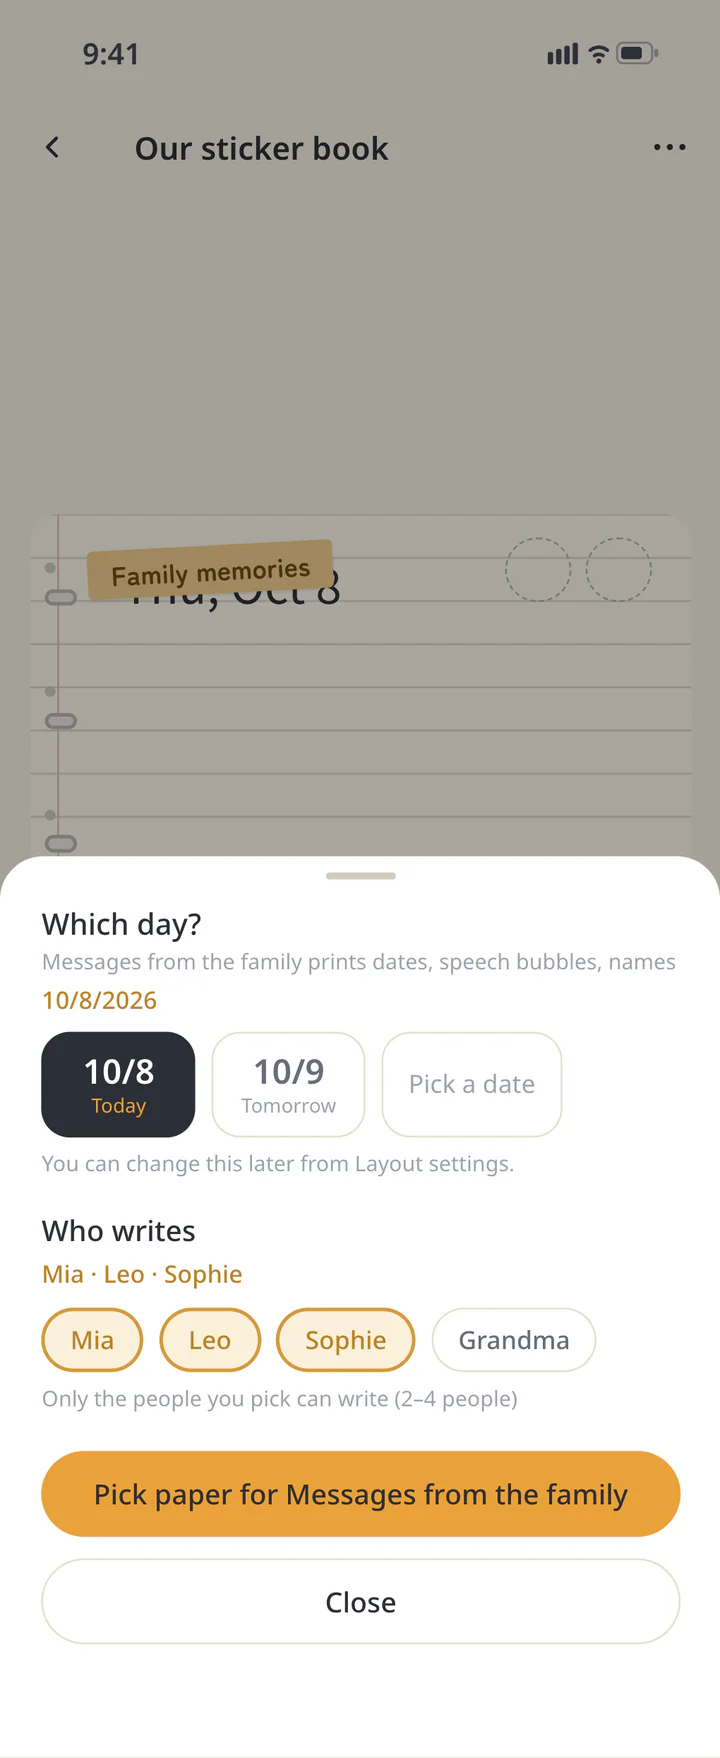
“One-day diary” uses a date. “Letter paper” uses “To”. A “Messages from the family” page uses a date and “Who writes”; choose two to four writers. If prompted for these details, fill them in, then press the paper-selection button at the bottom. Layouts without setup fields go straight to paper selection. Choose available paper and press the creation button containing its name. If the page editor opens, tap “Done” at the top to return to reading the book.
Set the date, writers or recipient, then choose paper - 14
Step 14If needed
Tap a text box while reading the book
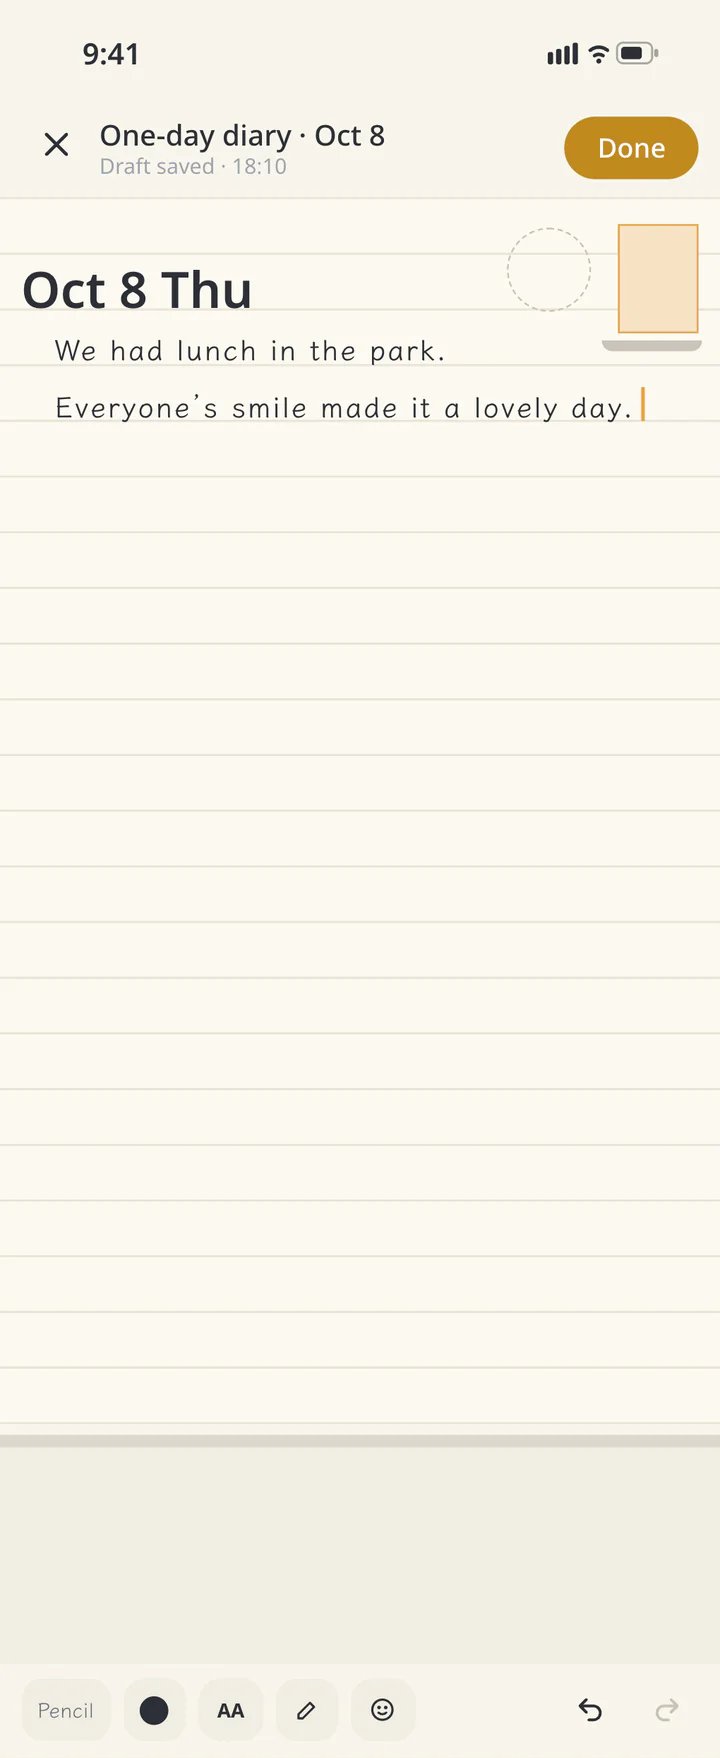
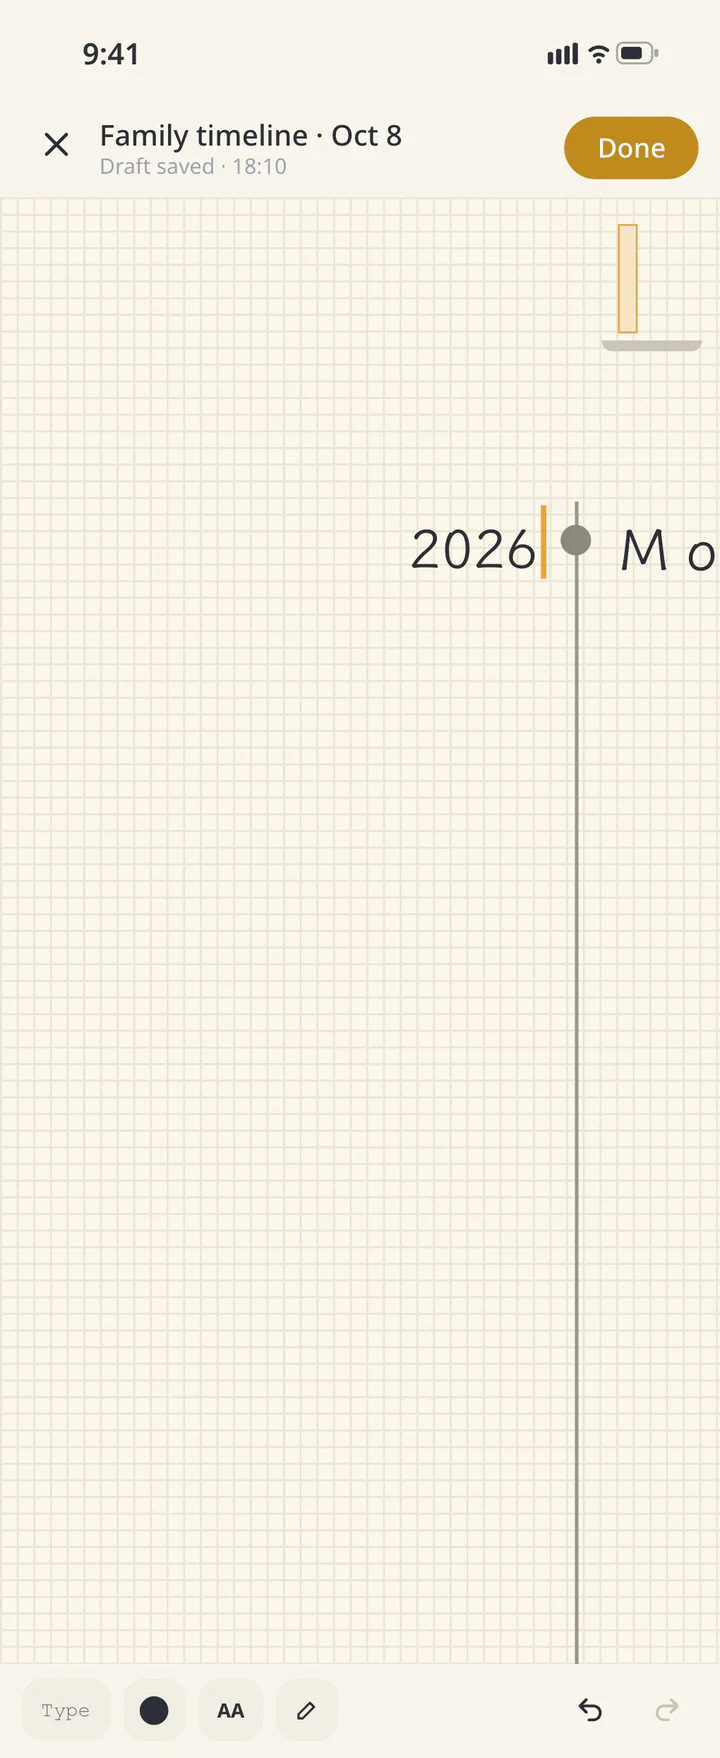
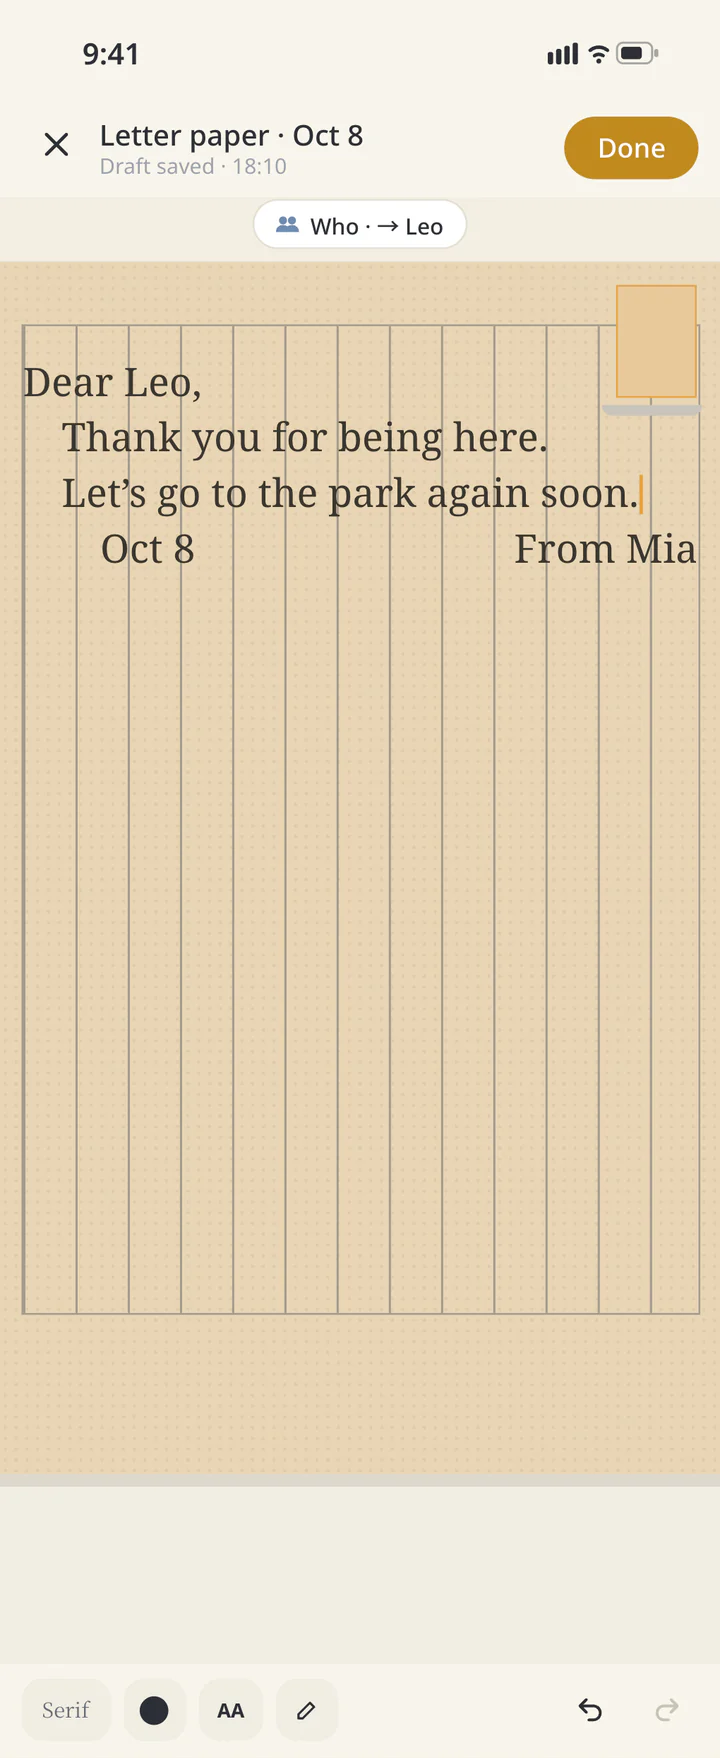
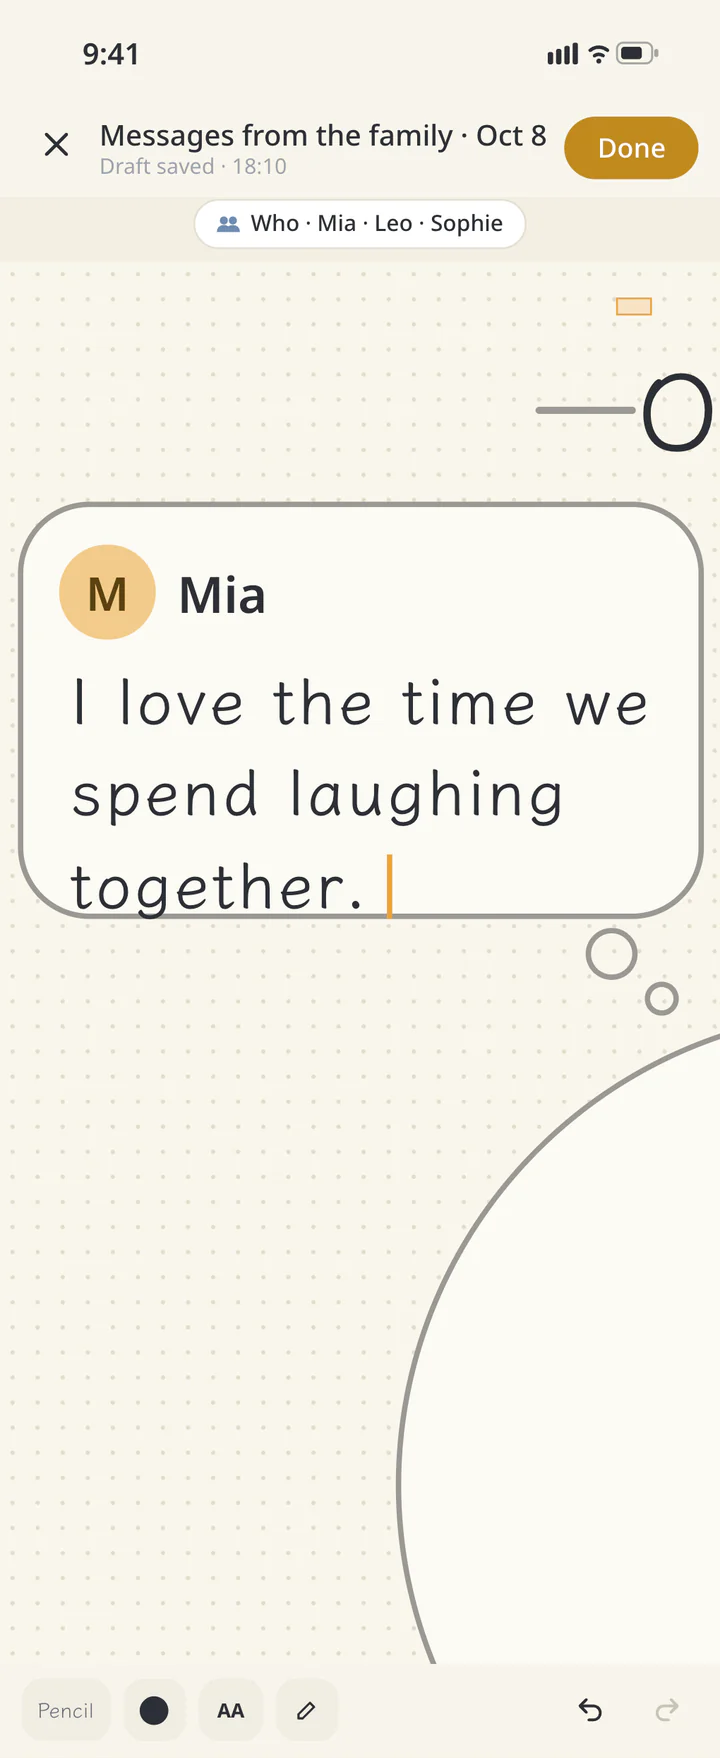
Tap a text box in the book’s reading view to open the writing screen. Use the body box for “One-day diary” and “Letter paper”, the year and event boxes for “Family timeline”, and your assigned box for “Messages from the family”. You cannot edit another writer’s assigned box. Body boxes or event boxes in “Family timeline” that support continuation add pages as your text grows, up to four pages including the original. Fixed-size boxes, such as “Messages from the family”, show “This box is full” when full.
- Write in “One-day diary”
- Add years and events to “Family timeline”
- Choose a recipient and write on “Letter paper”
- Write in your assigned box in “Messages from the family”
- Write horizontally on 400-character manuscript paper
- 15
Step 15If needed
Check horizontal writing
In English, new writing in “Letter paper” and “400-character manuscript paper” is horizontal. The vertical-writing option is available when the app is in Japanese or Traditional Chinese and the text box supports it. Open “Font” to review the formatting available in your current app language.
Check horizontal writing - 16
Step 16If needed
Finish and save your writing
Review your text and tap “Done” at the top of the writing screen. A successful save returns you to the book. If saving fails, your draft stays available; check your connection and try again.
Finish and save your writing - 17
Step 17If needed
Choose the saved image’s shape and photo visibility
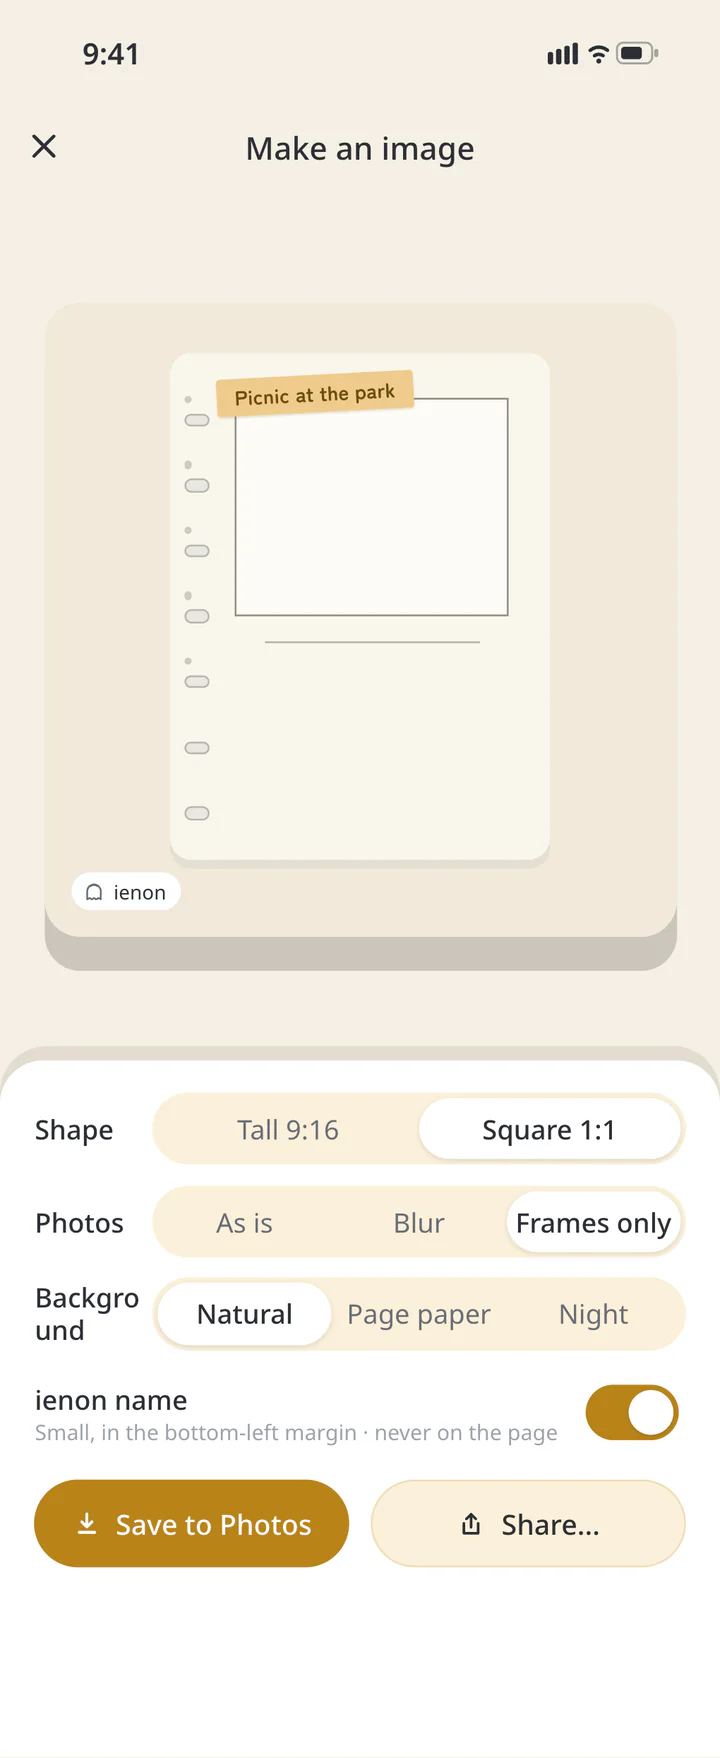
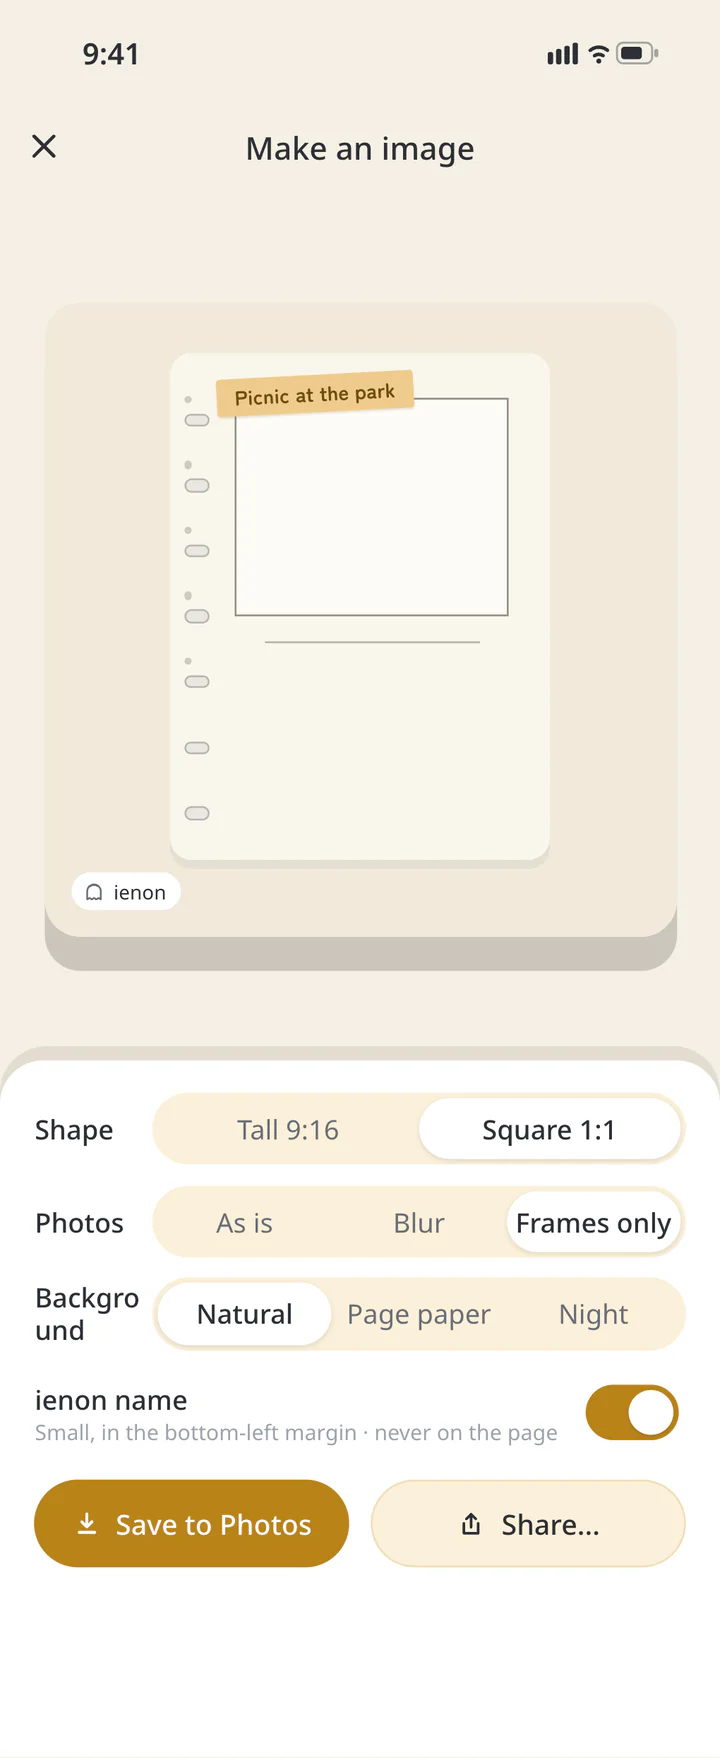
To save an image, open “Make an image” from the page menu. Choose “Tall 9:16” or “Square 1:1”, then choose “As is”, “Blur”, or “Frames only”. Use frames only if you do not want photos in the saved image. “Frames only” also hides your writing. To keep the text, choose “As is” or “Blur”.
Choose the saved image’s shape and photo visibility - 18
Step 18If needed
Check continued pages and text visibility
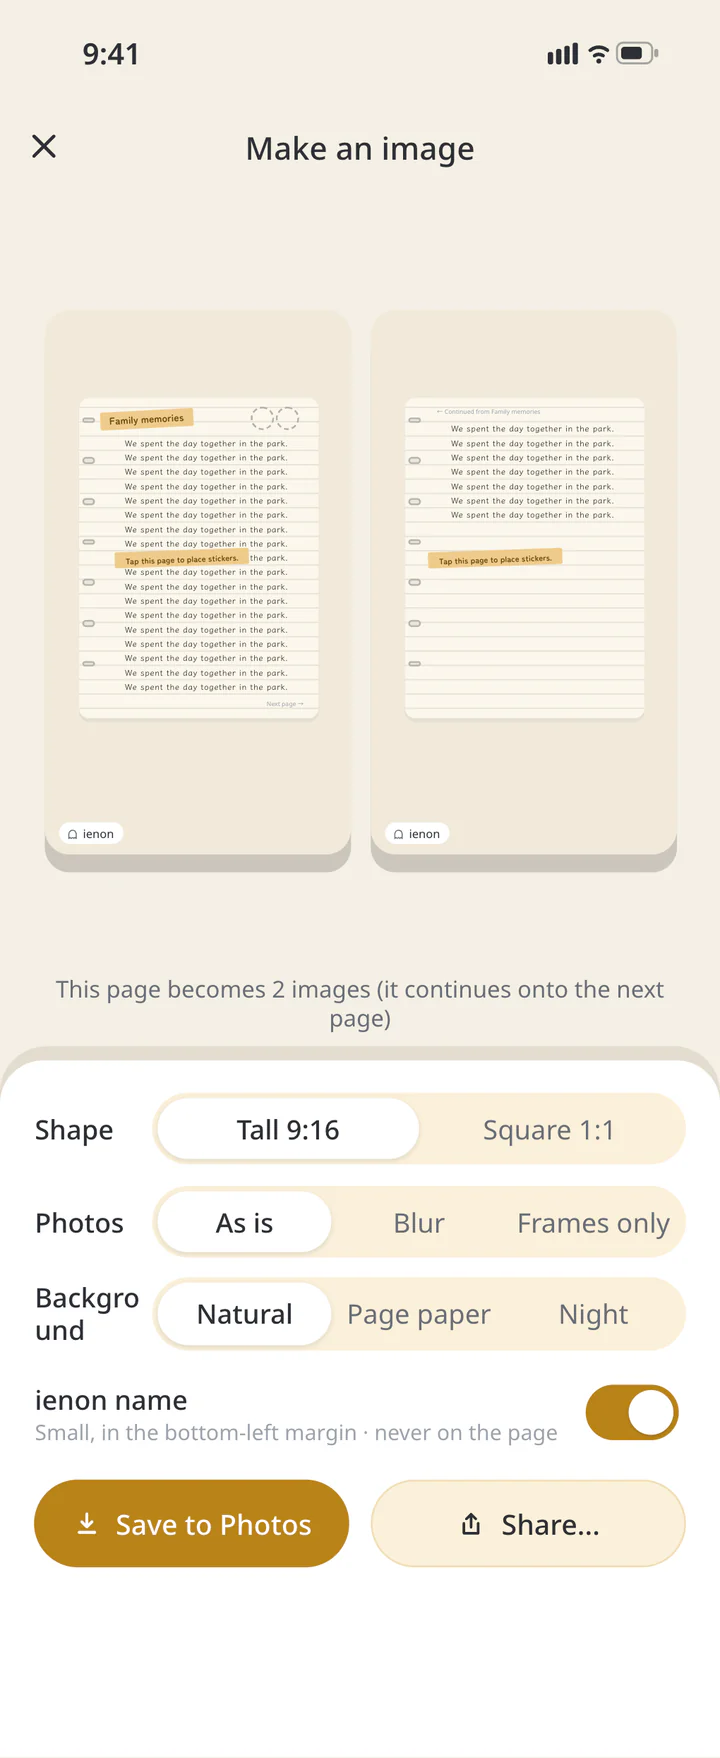
A page with continuations can be exported together with the original. Check the image count and preview each page. To keep your writing in the images, choose “As is” or “Blur” for photo visibility. “Frames only” also hides your writing. Saving creates one image per page.
Check continued pages and text visibility - 19
Step 19If needed
Check the preview and save to Photos
Review photos and text in “Finished image”, then tap “Save to Photos”. Allow saving to Photos if your device asks. After the success message, check the image in your device’s Photos too.
Check the preview and save to Photos - 20
Step 20If needed
Review what the web copy includes
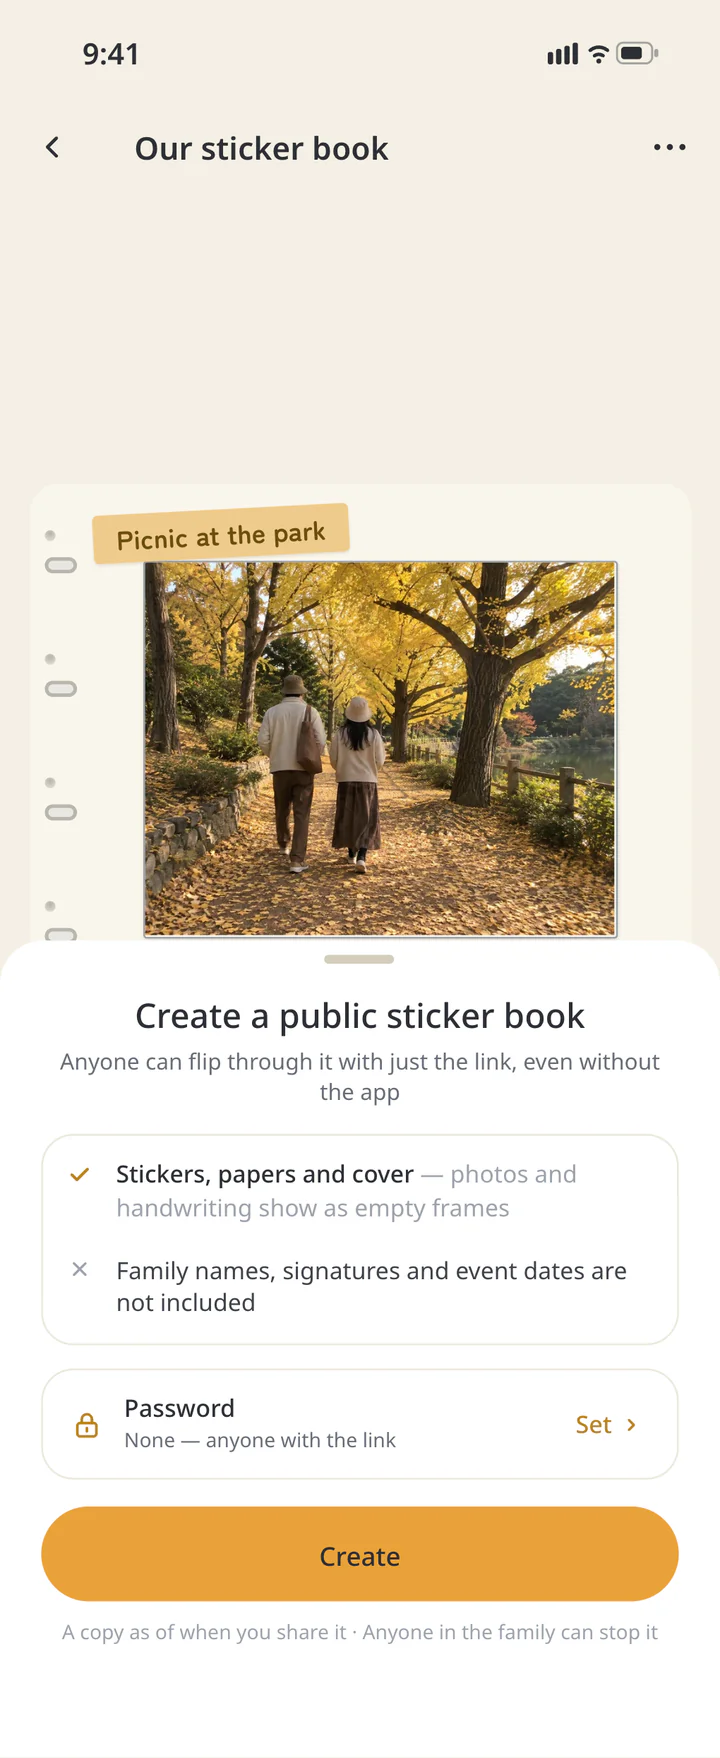
For a web link, open “Share on the web” in the book menu. The copy includes stickers, papers, and the cover. Photos and handwriting become empty frames; family names, signatures, and event dates are excluded. It is a snapshot taken when you share. Text you write does not appear in the public web copy.
Review what the web copy includes - 21
Step 21If needed
Set a password if needed
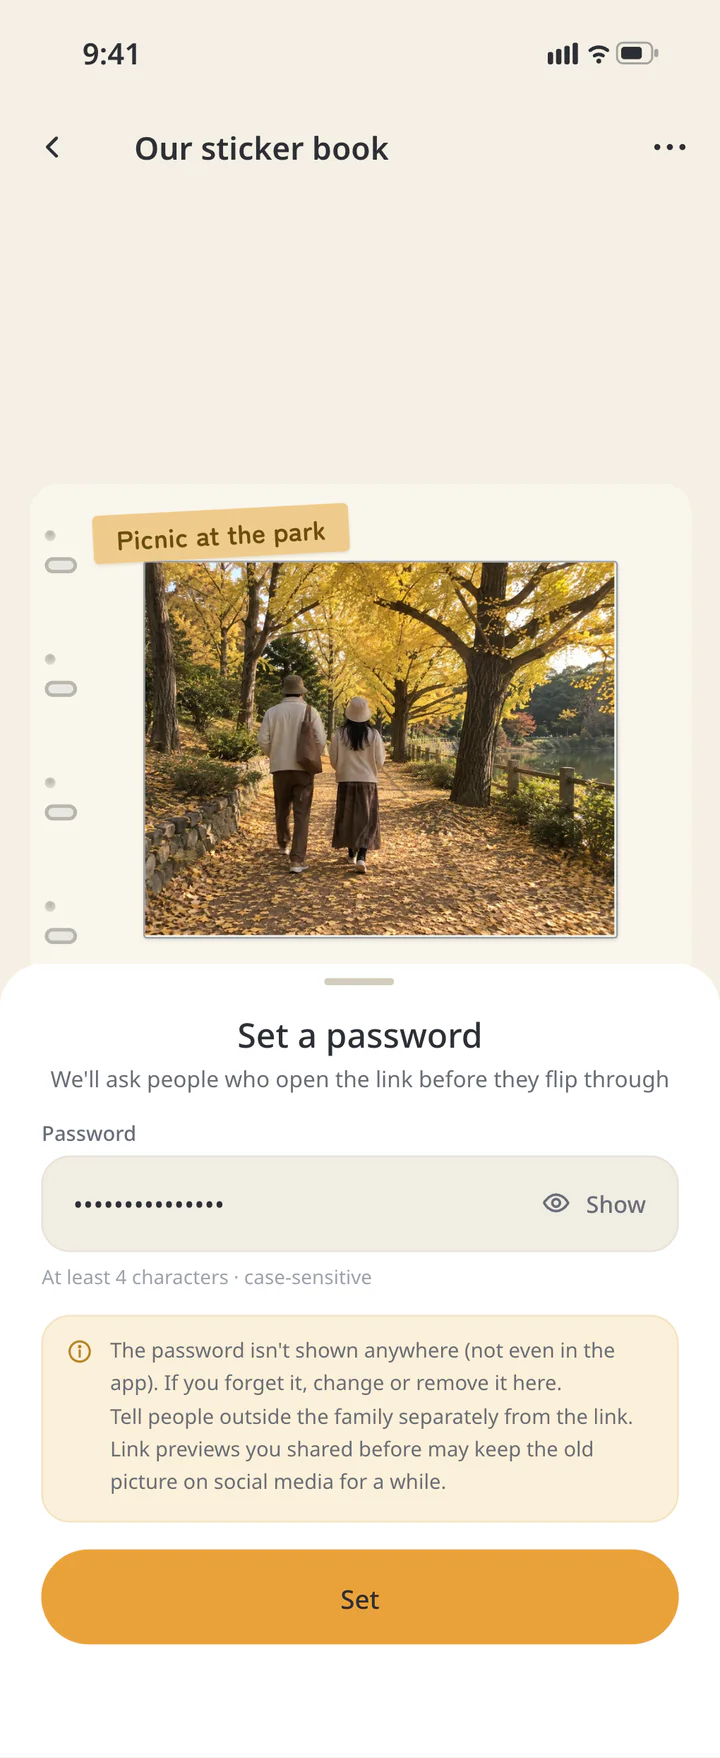
To restrict access, tap “Set”. Enter at least four characters in “Password” and confirm with “Set” at the bottom. Passwords are case-sensitive. Back on the confirmation screen, check that a password is pending.
Set a password if needed - 22
Step 22If needed
Create the web copy and copy its link
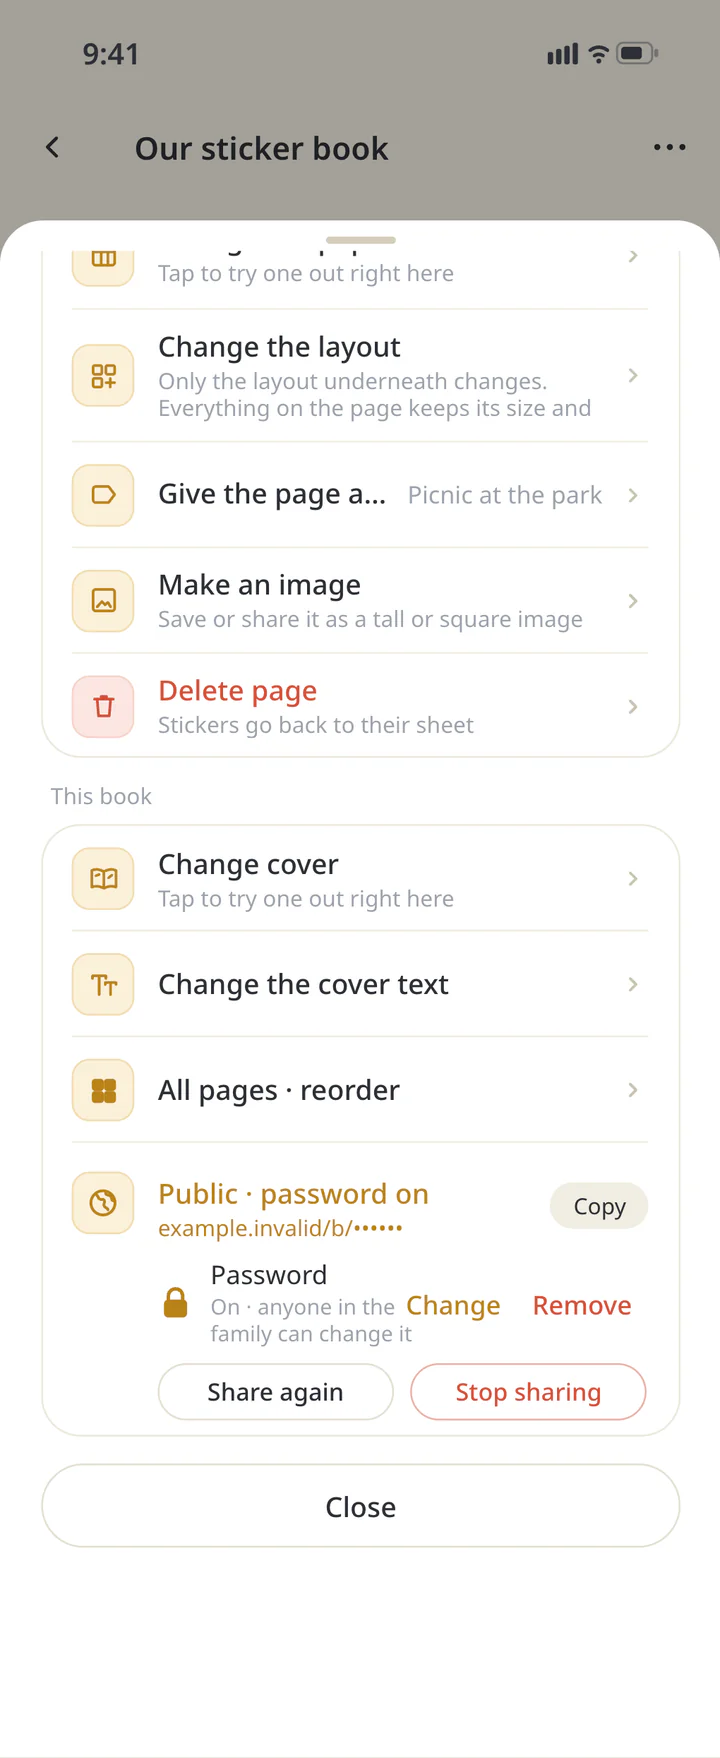
Review the settings and tap “Create”. Once sharing succeeds, use “Copy” to copy the link. Tell the recipient the password separately from the link if you set one.
Create the web copy and copy its link - 23
Step 23If needed
Update the copy or stop sharing
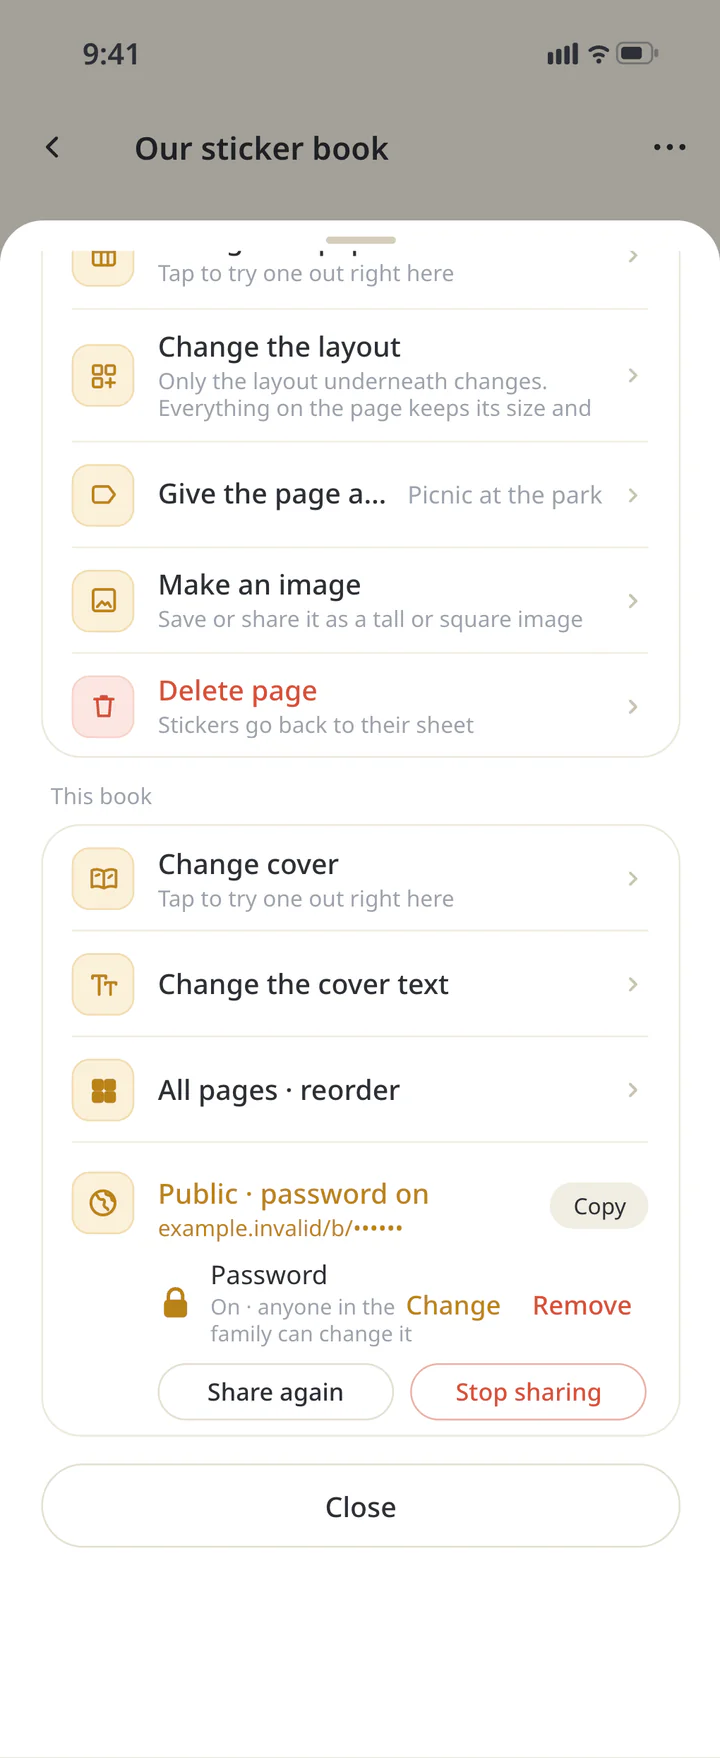
Editing the book at home does not automatically change its public copy. Use “Share again” to update it, or “Stop sharing” to stop access. Other Home members can stop sharing too.
Update the copy or stop sharing


TROUBLESHOOTING
If something doesn’t work
QAre photos always hidden in saved images too?
Image export and web sharing differ. Images initially use As is for photos. Choose Blur or Frames only if needed and review the preview before sharing. The public web copy shows photos and handwriting as empty frames.
QWhy can’t I add a phone photo?
Check photo permission and your Home’s storage. If storage is full, you can still choose photos already in the family album even when adding from your phone is unavailable.
QWhat if I forget the password?
The saved password is not shown in the app. Use “Change” or “Remove” in the book’s sharing settings. Removing it lets anyone with the link view the copy without a password.
QWhy is my writing missing from an image or web copy?
“Frames only” hides writing as well as photos. To keep your text in an image, choose “As is” or “Blur” and review the preview. Text you write is excluded from the public web copy.
Download ienon
Turn your Home’s photos into a page of memories.
History: Published October 9, 2026 — checked against app 16.5.0